

Multiple Routes Approach
The core level design philosophy revolved around giving the player multiple routes they could take to overcome the obstacles in their own way. This way the player has the agency to create their own solutions based on their preferred approach.
Below are just a few examples of what the player might do.

Primary route of avoiding the AI to hack the control panel opening the door.

Side Route which looks more dangerous due to lots of Enemy AI but rewards the player with a different path.

Route which can be accessed if in the previous room they opened the mine cart gate.
Setting Up Custom Events
I also improved and added new custom events in order to make certain level sections feel more dynamic or provide additional challenges.

Hacking this panel provides access to a minecart that the player can utilize later.

Dynamic event where rocks break the bridge and force the player to slow down.

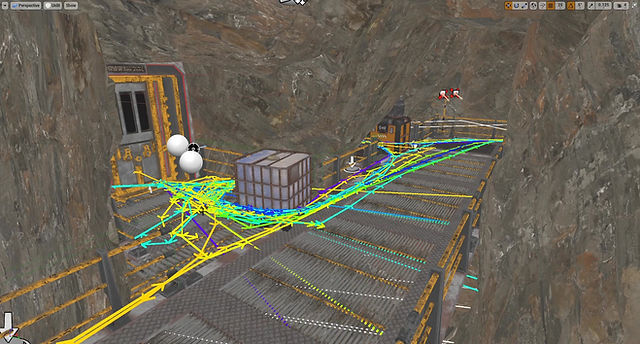
Example of setting up the AI route.

Gameplay Section with the AI

Example of the waypoint tool I used to create the AI path.
-
As always the art pass brought with it a few problems such as there being collision issues or certain assets having been forgotten from the planning.
-
However due to the level metrics that had been defined earlier into the project the implementation of assets like the walkways went quite smoothly.
-
During this stage I worked on implementing any missing functionality such as the narrative, adding collectables, iterating on custom events but most importantly testing the level if everything played as intended.
Heatmap:
-
In order to gather more playtesting data the programing team creating a heatmap that would track critical information as the player traversed through the level.
-
I could then access this data to see how players moved through the level, what type of problems they ran into and if anything unexpected was happening.
-
I would then utilize this data to make improvements to the level. Unfortunately at this stage of the project there was very little time left so I was very limited in the changes I could make.
Finalizing Custom Events
At this stage I also worked on finalizing the custom events making sure that the event played smoothly and that anything like sound effects or voice lines had been integrated.

Custom event that serves to introduce the Large AI in a safe environment.

In this event the path behind the player collapses which creates a point of no return.

Improving Hacking Mechanic:
-
One of the problems we had is that it wasn't always clear what the hacking panel connected too.
-
As such I worked on improving the visual feedback of the hacking by adding in visual effects (in the form of moving electricity) and a bright rotating light.
-
This greatly helped visualize what object the hacking panel had affected once activated.
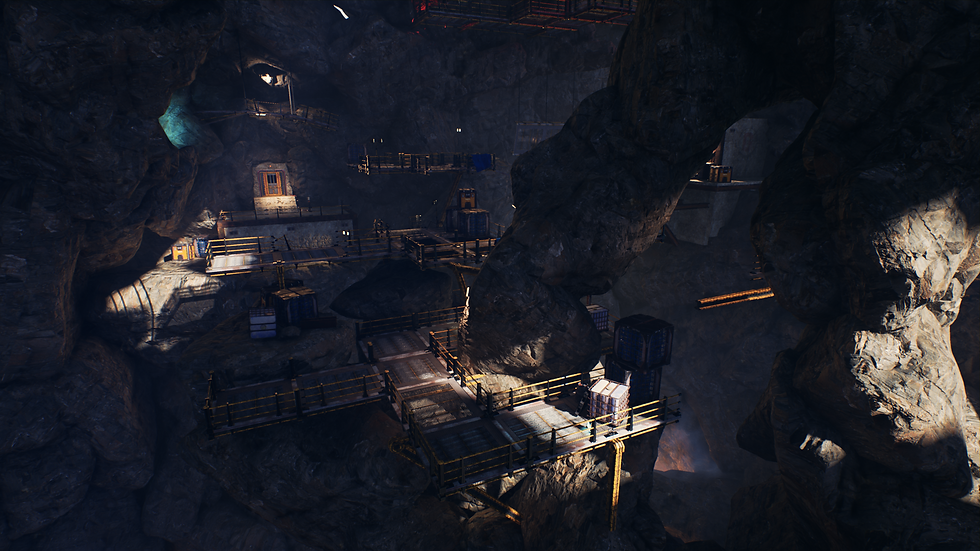
Comparison between Whitebox and Release
Takeaways:
-
Working on a project like Levis Umbra is a bit of level designers dream as stealth games really let the level design play a primary role.
-
As such it gave me the opportunity to develop new skills such as implementing AI and their multiple interweaving routes as well as polishing up skills like creating well defined blockouts.
My biggest mistakes:
-
The size and complexity of my level were quite a bit over scoped but I didn't realize this in time which meant that the remaining levels didn't get nearly as much attention from the art team.
-
I also vastly underestimated the complexity and difficulty of implementing custom events as setting them up in blockout is quite easy but polishing them up for release take a lot of time and effort.
My most impactful learning experience:
-
This is of course obvious to anyone working in the industry but delivering a completed level where everything from the lighting to every trigger box has been implemented, optimized and properly tested is a much longer process than I first expected. So I'm happy that this project allowed me learn about the required effort to truly complete a level.


Levis Umbra
Featured in the Unreal Student Showcase
Summary
Project Information
Genre:
Team Size:
Project Duration:
Engine:
Platform:
Primary Role:
Secondary Role:
Stealth
14
May 2020 - July 2020
Unreal Engine 4
Released on PC
Level Design
Game Design
Description
Levis Umbra is a 3rd person Action Stealth Game. Infiltrate an underground facility and avoid the machines at all cost. Find a way to go unnoticed as you penetrate deep into the core, armed only with a hacking device and your wit.
Responsibilities
Level Design:
-
I was responsible for creating 1/3 of the playable content by designing and building the 1rst level to the game which also served as the onboarding level.
-
I scripted key events, integrated A.I, balanced gameplay, and utilized a heatmap data tool for a professional iteration cycle to improve the player experience.
-
I maintained cross-disciplinary communication to ensure smooth implementation of core mechanics as well as the integration of the art pass.
Other:
-
I was responsible for creating VFX and lighting parts of the level.
-
I balanced the enemy AI making changes to stats like their movements speed, hearing range and attack damage.
-
I worked on improving the visual feedback of the hacking mechanic.
Level Design Process
Development:
-
I fully developed a level from the initial blockout to a whitebox and finally to a completed level with a full art pass.
-
This level also served as the onboarding for the game introducing the player to all the core mechanics such as the movement, hacking and enemy AI.

Early Project Stages

Establishing Core Documentation:
-
In the early stages of the project we first focused on establishing core documentation such as the LDD or Conditions of Satisfaction.
-
We planned out the player experience through all 3 playable levels by creating a node map so we could define the expected player flow.
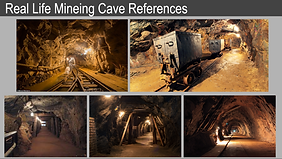
Defining Environmental Tone:
-
Working together with the art team we gathered a lot of environmental references in order to define the tone of game while giving architectural guidance to the team.
-
This greatly helped in the later stages of the project as we could always go back to certain references to help the team stay aligned.


Gym Level & Metrics
Early on in the project we worked establish key level metrics so that that all level designers would be building with consistency.

Character Gym that we used to define level metrics (created by one of the game designers).

Gym Level where metrics such as door sizes, stairs and cover heights were defined.
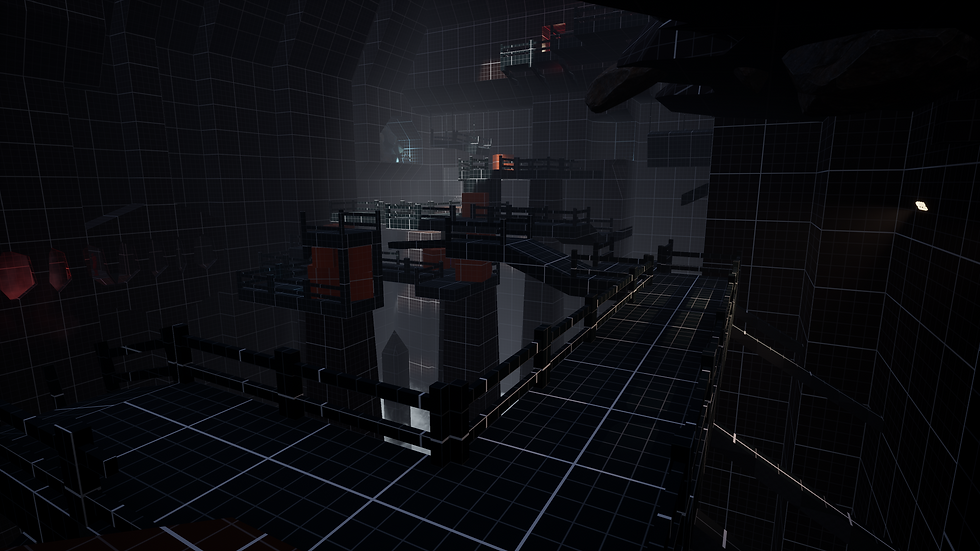
Blockout
Creating the First Blockout:
-
This blockout was built within the first week and a half of the project which was very important to us as we could start getting a feel for the level flow straight away.
-
Since mechanics such as the hacking or AI had yet to be implemented I mostly focused on creating movement challenges and preparing the spaces that the AI would later inhabit.

Prototyping Events:
-
I also worked on scripting custom events such as the introduction to the large enemy AI or collapse of a walkway.
-
In order to provide as much feedback to the player as possible (even in a prototype), things like sound and camera shake were added as well.
Warning video might be loud
Creating a Playable Build:
-
By creating a playable build of the level I was able to test with people outside of the team. This was great as it quickly reveled what sections of the map were weak and what could be improved on.
-
As a consequence it also meant that on my next iteration pass I made a number of major changes to accommodate the feedback that I had received.
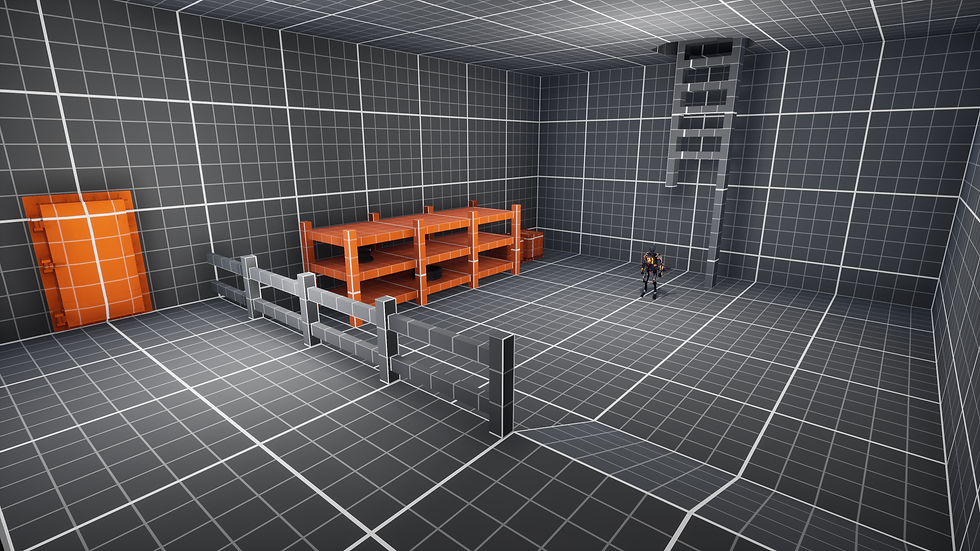
Whitebox


Moving into Whitebox:
-
Utilizing the feedback I got from the previous iteration I drastically cut down on the amount of movement sections and focused on introducing the player to the heart of the game more quickly.
-
I also fully implemented all core functionality such as the AI, scripted events, saving and loading, hacking panels, placeholder lighting and VFX.
-
Throughout this process I continued to work with the core level design philosophy to create level setups that push the player agency.
Guiding the Player:
-
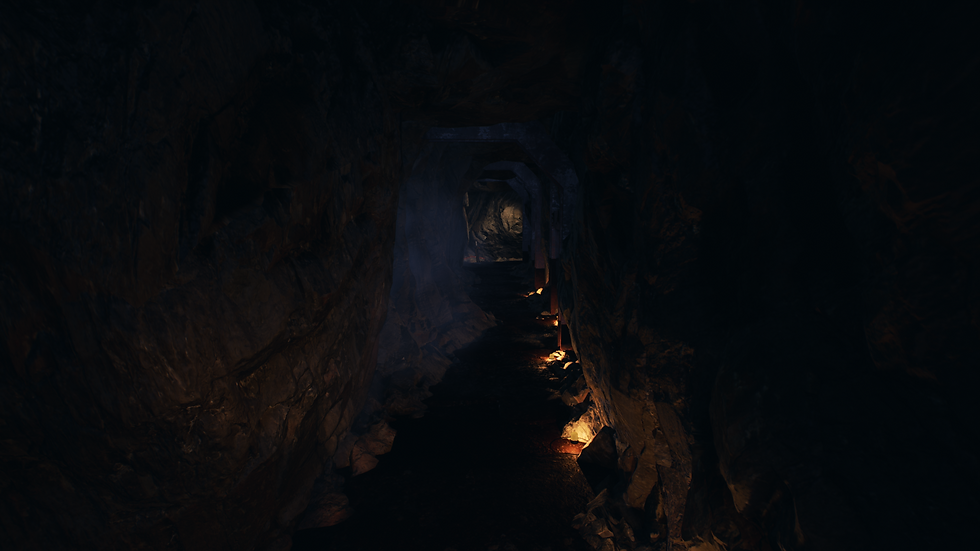
I integrated lighting in order to guide the player and direct them towards key level areas such as the end of the cave.
-
I also integrated additional ambient lighting and vfx to help establish the atmosphere.

Integrating the AI:
-
Once the AI along with the waypoint tool had been created I worked on integrating the AI into the level and creating patrol paths.
-
Luckily the tool was quite flexible and provided key information such as the path duration so it was easy to set up.
-
During this time I also worked on balancing the AI adjusting things like the damage, movement speed, vision cone and hearing radius.
Art Pass & Release
Moving into Art Pass: